Drone photography has experienced a surge in popularity in recent years. Gone are the days when aerial images could only be captured from aircraft or hot air balloons. Thanks to affordable consumer drones, we now have the opportunity to take to the skies and capture stunning birds-eye views.
When it comes to drone photography, simply flying a drone and taking pictures may not yield the desired results. To capture stunning and impactful images, it’s important to consider various factors and follow some top drone photography tips. By doing so, you can elevate your drone photography game and take it to the next level.

Shoot RAW images

If you’re passionate about drone photography, this tip is a must-know. Raw files provide exceptional flexibility when processing images with top-notch photo editing apps. By capturing aerial images in raw format, you gain access to a wealth of information for optimal image processing.
Capturing images in raw format offers significant benefits compared to JPEG. Raw files preserve a wealth of data and dynamic range, allowing you to fully utilise your drone’s camera sensor. Unlike compressed JPEG files, raw images retain all the information, preventing loss of quality.
Plan your shoot, research the location
Drone photography offers a unique perspective, capturing views that are inaccessible from the ground. However, it’s important to plan your subject beforehand instead of aimlessly flying around. Randomly searching for a suitable subject can drain your batteries and limit your flying time.
Instead of relying on luck, it is advisable to plan ahead and scout for potential photography subjects and compositions. Google Maps is an invaluable resource that allows you to research and identify shooting locations in advance. Similarly, Google Earth provides useful insights into the topography of your desired location.
Another useful tip is to check YouTube for other videos produced by drone operators at the location you plan to shoot, quite often you will find other drone hobbyists have already shot the location.
What time of day is best?
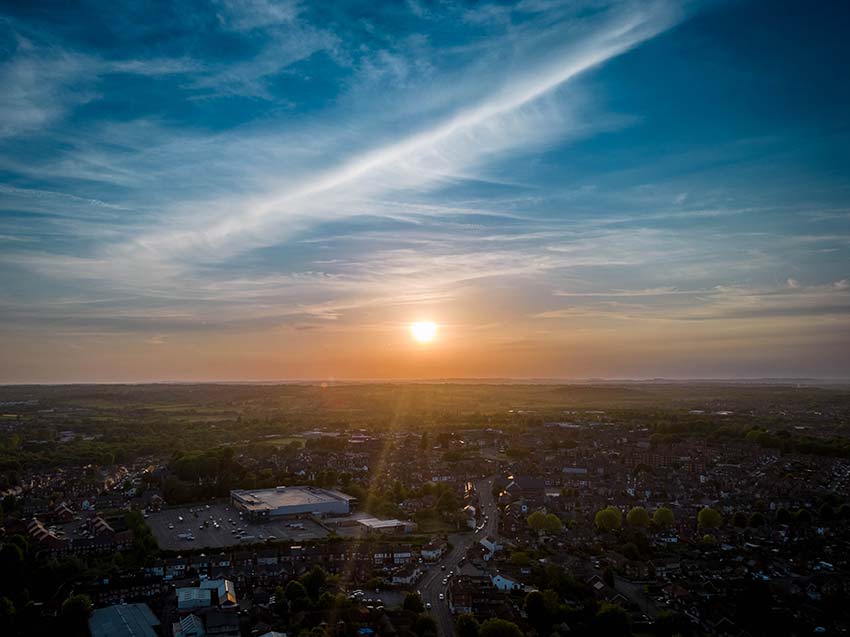
Lighting plays a decisive role in drone photography. To capture stunning aerial images, you need to choose the best time of day and optimal lighting conditions.
Generally speaking, early mornings and late evenings are considered the ‘golden hours’ for photography. During these times of day, sunlight has a softer quality that produces beautiful warm tones, making it an ideal time for shooting.
Mid-day is usually not the best time to take drone pictures as the midday sun produces harsh and unflattering shadows. Avoid taking aerial shots during this period or if possible, wait until later in the afternoon when light becomes softer and shadows are less intense.
Good lighting is crucial in drone photography, just like in any other form of photography. Avoid shooting towards the sun during the day to prevent distracting reflections from buildings or water.
Remember the Rule of Thirds
When operating your drone, you have endless possibilities to capture your subject from various angles. However, this brings up a new challenge – how to compose the perfect shot. The Rule of Thirds, a well-established composition guide in terrestrial photography, can be equally effective in drone photography. Many drone models offer a grid overlay feature that can be activated through the drone’s app settings.
When capturing images, utilise a 3×3 grid overlay for precise positioning. Anchor your subject in one of the four corners of the central rectangle to achieve visually pleasing off-centre compositions. This technique allows for a balanced image with elements, colours, or negative space.
Additionally, if your photo includes a horizon, position it on the grid to fill the top third of the frame, with the landscape filling the bottom two-thirds. Improve your photography with these composition tips!Composition In General
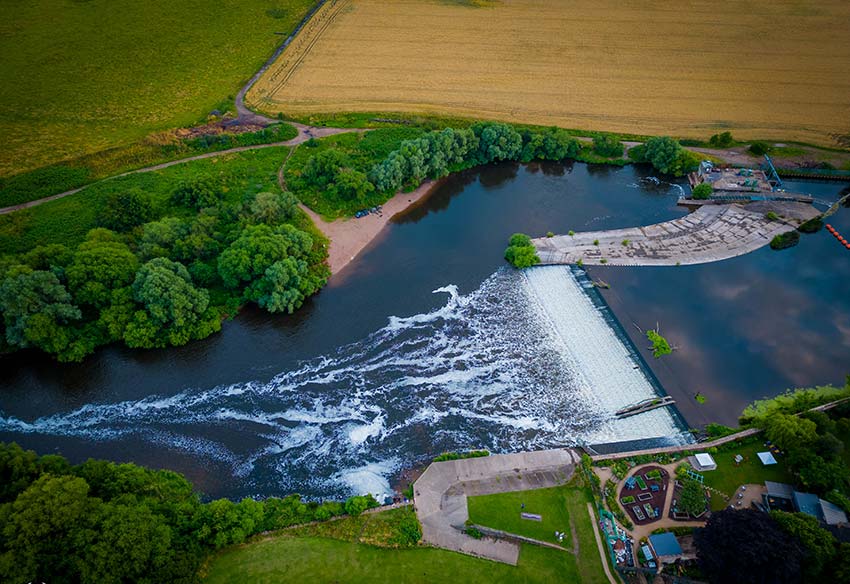
Leading lines: Including a strong leading line in your image composition not only draws the viewer’s attention but also adds depth and visual interest. Examples of effective leading lines are rivers or rows of trees. Enhance your image’s appeal and captivate your audience with strategically placed leading lines.
Experiment with height: When capturing drone images, it’s not necessary to ascend straight up to 400ft for a great shot. Experiment with shooting your subject from varying heights to observe how it impacts the image. Some of the most stunning drone images are often captured from lower altitudes. Discover the art of aerial photography by exploring different perspectives!
Look for patterns and symmetry: Incorporating repetitive patterns and symmetry in the landscape can result in captivating images. Including these elements in top-down photography can create a striking and visually appealing effect.
Use a low ISO
Reduce noise with image stacking
Auto Exposure Bracketing (AEB)
Use ND Filters

Enhance your drone photography with essential accessories. Invest in high-quality Neutral Density (ND) and Polarising filters, like those from PolarPro or Tiffen, to have full control over the light reaching your sensor. These filters allow for stunning long-exposure photography in the right conditions. A Circular Polarizer filter is incredibly useful in photography. It effectively reduces glare from reflective surfaces such as glass and water, enhancing the saturation of colours and boosting the contrast of your images. This filter is ideal for making your photos vivid and eye-catching.